Aside

Oh the places we will go…

Happy New Year Everyone!!! Welcome to the new home for my blog 🤓.  If you haven’t had a chance to read my previous posts, check them out 😀 I am still trying out different platforms, so now it’s on to WordPress!

As we are embarking on 2018, I have been thinking about some of the projects I have worked on with teachers and their students.  Since this is a brand new job for me, I have been working hard to be sure that I am providing the support that teachers need, while also trying to encourage teachers to try new/different ways to incorporate technology into their lessons.  There are many teachers that I have shared new ideas with, but then there are the risk-takers who have allowed themselves to be my ‘guinea pig’ when their lessons/content/tasks match a new tech idea that I have.

One of the first ideas was using Google Tour Builder to create a Lit Trip.  I had first heard of these last year, but it wasn’t until I was talking with a 7th grade English teacher who was looking for an alternative way for her students to do a presentation about the book they were going to be reading, A Long Walk to Water by Linda Sue Park, that I travelled down this road.  Since the story takes place in a number of different locations in the world, I thought it would be a great time to try out a Lit Trip.  I got the idea from Eric Curts who had a post Create Your Own Lit Trips (and more) for Google Earth that I had seen on Twitter.  This post is fabulous, step by step screen shots that walk you through exactly what you need to do to create a Tour.  If you are looking to make one, I highly suggest checking out his post (and the rest of his website!).  Then I saw his post about Launching Tour Builder Tours in Google Earth with One Click…Oh Joy!

The first day I worked with the students, I introduced what Google Tour Builder was by showing them a sample one I made about myself and allowed them some time to create one about themselves about either places they have been or would like to go to.  I wanted them (and the teacher) to be comfortable using it since I would not be with them the next time they were in the computer lab and starting the Lit Trip.


I also had them install a Chrome Extension called Vidyard GoVideo, so they could make a screencast of their Lit Trip and add in audio.  The videos were then downloaded and added to an unlisted YouTube playlist so they would be able to see the projects made by all of the students in each of her five classes.  I made a quick help video showing how to make their screencast using Vidyard to show the students when they were ready.

Overall, the teacher and students were quite pleased with this project (and so was I)!

After speaking with a librarian about Google Tour Builder, she asked me to come in and work with 5th-grade students who were researching Latin America countries…she had a teacher who wanted to try something DIFFERENT with her students when it was time for them to present their findings.  It’s all about Baby Steps…

What are you waiting for?

Thank you Insert Learning for unblocking my blog writer’s block! I figured since I can’t stop talking about this Chrome extension, I might as well write about it! If you don’t know what Insert Learning is, it allows you to turn any webpage into an interactive lesson…how awesome is that?! So, that is why I ask, what are you waiting for?! Don’t walk, run and install this extension!

insert learning

Since I am currently not in the classroom, I have been using this extension to help deliver content in my PD sessions with teachers. The response has been incredible. They are so excited to learn about it, and most of them immediately use it within a few days of the introduction-talk about successful PD!

With a FREE account, you are able to create 5 lessons, however, Insert Learning gives you an opportunity to earn free months by sharing a unique link to their extension with others. In fact, it gives you and the person you share it with, a free month. You can tell this was created by teachers…always thinking.  If you choose to purchase a license, it really isn’t expensive ($40/year, at this time) and compared to other tech tools out there and the benefits of Insert Learning, it would be worth every penny.

So, let me start gushing over all the fabulous things you can do with Insert Learning! Here is the toolbar you will see when you open a webpage in Insert Learning:

InsertLearningToolBAr

The first tool allows you (and your students) to highlight text on the website as well as adding a comment/annotation (and here’s how to check to see what they wrote).

InsertLearningHighlightGIF

The next tool is a Post-it note-this is soooooo versatile! At the most basic level, you can type on the Post-it and leave directions or provide information for your students.  You can also paste things onto the post-it: images, links to videos, embed codes… Last, but not least, you can record your own video for your students.

InsertLearningPostItGIF

As you keep moving down the toolbar you get to the question tool. You can easily add open-ended questions, as well as multiple choice questions (these can be auto-graded).  You can add point values to the questions as well. This explains how to view and grade student answers and students can go to their dashboard to see their grades.

InsertLearningQuestionGIF

The last option to start a discussion.  This allows students to respond to a question and allow everyone to see their response.

InsertLearningDiscussionGIF


Also, if you happen to have any Google Docs, Sheets, Google Drawings, Slides…that you would like to ‘insert learning’ into, all you need to do is PUBLISH IT TO THE WEB and you will be able to use all of these great features on your own resources as well.

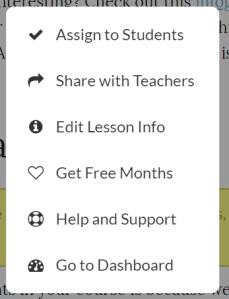
There is one more menu to take a look at:

InsertLearningMenu

Your Teacher Dashboard is your ‘control center’.

InsertLearningDashBoard

From here you can access all of your lessons, see how your students are doing on your assignments, and find the class share codes (and even add in a co-teacher!)

If you are currently using Google Classroom, Insert Learning integrates with it and allows you to share to Google Classroom. If not, have no fear, you can create classes within Insert Learning and give your students a join code to access your lessons. Be sure they are signed into Chrome and have installed the Insert Learning extension prior to starting your first lesson.

Their support area is very informative.  There are a number of articles that answer many of the questions you may have when you are getting started. In addition, there are many videos that go step-by-step if you need additional support.  If none of these resources helps you, they are great about getting back to you if you contact them with a specific question.  Here is a quick guide to get your students started using Insert Learning.

As I mentioned before, this is such a versatile tool, with applications in so many aspects of our daily life in a school. It has worked out so well to use with teachers during professional development sessions and the feedback I have received is that they have had great success using it with their students.

Have you used Insert Learning? What are your thoughts? Have you found other uses for it?